How 25 fuzzy butts turned into 35…

photo

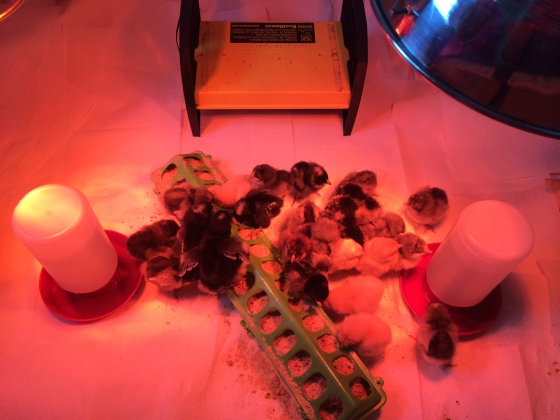
Just a few short weeks ago, we got our 25 new chickies in the mail….well it was supposed to be 25, but 27 fuzzy butts showed up. 🙂  Yay for extras!

Man, did we have issues getting chicks this year.  First off, we’ve never ordered this early.  We started looking in February, after the Valentines day massacre (that’s what we’re calling it anyway) when we went to close the girls up for the night and found one of them pecked to death. 😦  So sad, we had no idea what happened at first.  We thought something had gotten into the coop, but there is just no way for that to happen so we deduced that it must have been one of the other hens that did it.  That and she had blood all over her beak…that was the obvious clue. 😉

So we decided that rather than chance another going rogue, we made an appointment to send them away to freezer camp.  That left us chicken less…for the first time in 5 years!!  It was odd not tending to them daily.  Then the littles arrived and I was back on chicken mamma duty.  I figured that we’d get them free ranging by 8 weeks or so, but I neglected to do the math.  You see, the chickens as yummy, friendly and egg filled as they are here for tick control.  They love to eat ticks!  That is the whole reason that we have them.  I am deathly afraid of ticks.  They are creepy and carry disease.  YUCK!  We don’t want to use chemicals on the lawn so that the kids don’t get Lyme disease, only to end up poisoning them, that seems like a bad plan.  So enter the chickens.  Although they free range year round, I like to get them out as soon as the snow starts receding so they can get a jump on the bugs.  But, as I said earlier…my calendar and my math skills did not sync up this year so we had not birds to eat the bugs early on.

photo 1

photo 2

photo 5

About 3 weeks old

Anywho…Our first day outside this year and I see a tick crawling on the tiny blonde hairs leading to my baby’s angelic face.  Cue the freak out!!  AGGHHHHH!!!!

There is no way that I could wait the 4 weeks until the little ones could get out to eat the bugs so the search was on.  Within 2 days we had found 8 organic laying hens and within a week they were re-homed to our little farm and eating all of the bugs that their little hearts desired, as well as tearing up my flower beds.  A small price to pay for peace of mind.

photo 3

The “older”gals

photo 1

Meeting each other for the first time.

photo 2

First day in the sun!

photo 3

photo 4

Escape artists…they popped right through the fence!

I love these birds.  They are funny little creatures to watch and interact with and just having them roaming around feels like home.

So…Welcome all 35 fuzzy gals!  We’re glad to have you!

What to do with that fresh ham steak??

Last year when we butchered our first batch of pigs, we kept the ham fresh because the butcher used nitrates in curing and that is something that we don’t want in our food so we decided that we’d cure it ourselves.

It was a BIG ham and we’d never done anything like that before.  Long story short, because it was so big, the cure didn’t penetrate through the whole thing and only the outer 3 inches tasted like ham, the rest like a delicious pork roast.  No harm, no foul…it was still delicious.  Just not “ham” as we know it.

Fast forward to this year with a new butcher (still nitrate curing) and fresh ham steaks vs. a whole ham.  2 of the ham steaks I threw in the crock pot with apples and onions and they were good, but drier then I’d like.  This week I pulled out the last 2 steaks and decided to try curing them, again.

photo 3

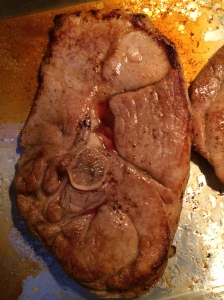
Cured ham steak

For 2 steaks about 3/4 inch thick

In a large shallow baking dish for the brine:

1.5 qt of water

1/3 cup organic brown sugar

1/3 cup organic maple syrup

1/2 cup sea salt

1/2 teaspoon organic vanilla

Mix it all up until the sugar and salt are dissolved.  Put in the ham steaks in and made sure that they stayed submerged (you can weight it down with a plate if you need to).

Place it in the fridge for about 24 hours.

Pre-heat the oven to 350 degrees

After 24 hours, rinse the brine of well.  Dry off the ham steaks very well.  Pan sear the steaks in a frying pan with some butter or even better bacon fat!!! Mmmmm..

When they are browned on both sides, place the pan (make sure it is oven safe) in the oven for about 20 minutes.  Depending on the thickness of the steaks, it may take longer or less time to cook.  Make sure your pork is 145 degrees in the thickest part.

Pull out of the oven and let rest for a few minutes…then eat!! Yummy!!

I served this with sliced potatoes roasted in bacon fat and sea salt and steamed cauliflower finished in the oven.

It felt like a frontier meal to me (minus the cauliflower of course). 😉

The kids gobbled it up and the hubs was in awe of the impromptu ham experiment.

All in all a great meal and the leftovers of ham and potatoes made an excellent breakfast skillet the next morning. 🙂

photo 2

Cured Ham Steak

The Dinner Party….

Our son hosted his first dinner party this past week!

He’s 7. 🙂

This child has been groomed to be a foodie.  He was never given the option to eat or not eat.  His only option was try it once, if you really don’t like it, then you don’t have to eat it.  To this very day he eats everything, except mushrooms

Lately his favorite show to watch is the Pioneer Woman!  He loves to watch her cook and his favorite episode is “Ranching in the mist”.  He has watched this particular episode so many times that he knows the recipes and the wording by heart.  The last time he watched this episode, he asked again if I could make the pop pulled pork.  Well, we don’t really drink soda , so cooking with it is out of the question for me, so I’ve said  no in the past to that recipe.

That same week we were all struck with the flu…boooo!  The hubs came back from the store with a natural soda called Dr. Better, because sometimes you just need something carbonated and it tasted just like Dr. Pepper!!  Light bulb!!  When everyone was feeling better and Ree Drummond was again on the screen, he asked again and this time I said sure!

He did the entire meal by himself!  I put everything in the oven and made the dough (which was Gluten free) but he did the rest from chopping onions to peeling and slicing the apples for the pie.

The hubs took the little one away for a few hours so we could have some space alone to work, and work he did!  He started at 11:30 am and finished when dinner was served.

IMG_5488

Cutting Onions

IMG_5489

Seasoning the pork shoulder

IMG_5498

Adding a little Dr. Better

IMG_5505

Slicing apples for the flat apple pie

IMG_5510

Cutting the cabbage for slaw

IMG_5512

Mixing up the slaw

IMG_5515

Making the potato au gratin (yes, he diced all of the potatoes) 🙂

IMG_5524

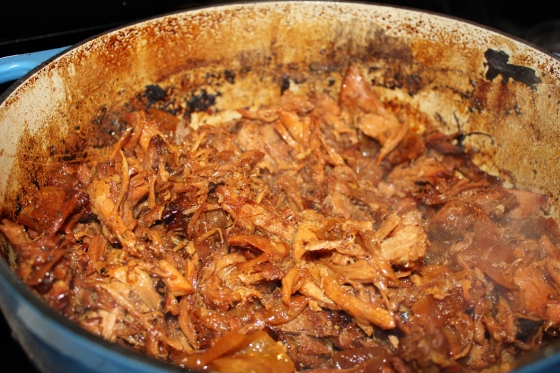
The finished pop pulled pork!

IMG_5529

Dinner is served!!

IMG_5532

Making caramel for the pie

IMG_5520

Pie is done!

IMG_5535

My guy! Sorry for the bad picture. 

IMG_5537

The whole meal was delicious!  The gluten free dough was so good!  You could never tell that there was no wheat in it at all.  The caramel was not my favorite recipe…it was a quick caramel and it lacked the depth that I love in caramel, but I wanted to stay true to the Pioneer woman evening, so we made all of her recipes.  I would certainly make them all again, with the addition of this salted caramel. 😉

I loved the feeling of pride that I saw on my little guys face when everyone was eating HIS dinner!  He was exhausted when bedtime rolled around and I think a little bit more appreciative of the meals that we eat…knowing a little bit better what actually goes into them.

He is already planning his next party with meatballs, pasta and cake.  I love that he loves being in the kitchen and I love even more the time that we get to spend together cooking.

Gluten Free Sunday Morning Potato Pancakes…

IMG_5100

Sunday Mornings around here are usually a slower pace, or we try to make them that way after the CRAZY busy year that we’ve had.

We always sit down to breakfast together and one of our favorite additions to breakfast is the potato pancake.

Easy, buttery goodness!  Not from a box or a mix it takes minutes to make and is a great sunday morning comfort food.

Ingredients:

(Organic if possible)

Medium Peeled Russet Potatoes ( you can use what you have, but russets work best and don’t brown as fast)

Butter

Salt and Pepper

Onion powder

IMG_5103

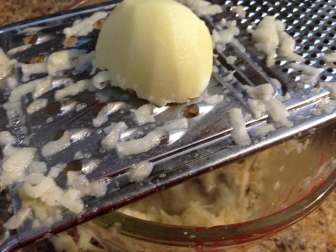
Put a large skillet on medium and add a tablespoon of butter.   Shred the potatoes 2 at a time into a bowl.

IMG_5104

Once the skillet is warm and the butter melted, grab about 1/3 cup of potato shreds and put it into the skillet.  Flatten with your hand.  Repeat until the skillet is full or until you need to shred more.   Sprinkle with salt, pepper and onion powder.  Cook until nicely browned, flip and cook until browned again.  You can hold these in a 200 degree oven until you are ready to serve them.

IMG_5105

Voila! Easy-peasy potato pancakes!  No fillers, no crap… Just delish!

Make extra and freeze ’em!  The freeze great and reheat in an oven or in a skillet super quick!!

These would be a great side to any meal as well, not just breakfast!  You can add rosemary and roasted garlic or jalapeño and cheese…the combinations are endless!

Give ’em a try and let me know what you think! 🙂

Bone Broth aka Stock… So good for you!
Quite a bit has been said lately about bone broth ( I call it stock) and it’s health benefits from keeping the immune system healthy to remineralizing teeth!!
IMG_4793

Crock-Pot Stock

I make stock at least once a week.  Usually from chicken, but sometime from beef.  Stock is an amazing way to use up veggies and bones from other meals like roasted chicken or beef short ribs.   If I am pressed for time (who isn’t), I usually throw the ingredients in a crock pot on low before bedtime and strain it in the morning.  The recipe below is for a stove top simmer, but if you are pressed for time or want a great meal when you get home from work, just throw it into a crock pot in the AM and set it to high.  When you get home, strain it and add some veggies, beans, rice, tomato paste…so many options!

IMG_4819

Slow Simmering Stock

Ingredients:

Please us organic ingredients if at all possible.  Sometime I use whatever I have on hand to make a stock. Leeks, red onions…whatever herbs I have around as well.  The Recipe below is a standard recipe to follow.

  • A 4 pound  chicken
  • 1 large onion, quartered
  • 4 carrots, peeled and cut in 1/2
  • 4 ribs celery and tops, cut in 1/2
  • 10 sprigs fresh thyme
  • 10 sprigs fresh parsley with stems
  • 2 bay leaves
  • 8 to 10 peppercorns
  • 8 whole cloves garlic, peeled
  • 2 gallons cold water

Directions

Place chicken, vegetables, and herbs and spices in 12-quart stockpot. Cook on high heat until you begin to see bubbles break through the surface of the liquid. Turn heat down to medium low so that stock maintains low, gentle simmer.  Add hot water as needed to keep bones and vegetables submerged. After about 2 hours, remove the chicken, pick off all of the meat and return the bones to the stock for additional simmering.  Allow the meat to cool and use in the finished soup, shred and season for chicken burritos, chop chilled chicken and mix with mayo, lemon juice and thyme for chicken salad….so many options!!
Back to the stock…Simmer uncovered for 6 to 8 hours.
Strain stock through a fine mesh strainer into another large stockpot or heatproof container discarding the solids (or eating them as a warm snack..yum!!). You can finish the stock by making into any stock based soup of your choice or cool immediately in  a sink full of ice water to below 40 degrees. Place in refrigerator overnight. Remove solidified fat from surface of liquid (you can keep the fat to sauté in or freeze it for use in roux) and store in container with lid in refrigerator for 2 to 3 days or in freezer for up to 3 months. Use as a base for soups and sauces.

Gluten Free Eating and Apple and Onion Roasted Pork…

IMG_5022

So….I’ve embarked on this gluten-free journey and so far so good!

 I have been so tired with a general feeling of crapiness for such a long time now, that I figured it was time to try something different.  Years ago, when the low carb craze hit, I did it and felt great (of course, I was a lot less fluffy then *wink, wink*)…but I remember feeling great.

 We eat great quality foods.  We eat organic foods with no preservatives or GMO.  We eat lots of fresh produce and meats that we raise ourselves (organically) or that we buy from friends who also grown organically.  We cook almost all of our meals at home, so we know what goes into them.  We don’t use chemicals in our home and use homeopathy as a means of getting ourselves well and  food based remedies as well.    We eat raw garlic and I make a bone broth (stock) at least once a week.  Why in the world am I so tired and icky??  I’ve been feeling that wheat/gluten is the culprit for a while but haven’t made the jump until now.  You see….I LOVE bread!  It is what I eat when I don’t feel good, it is what I eat when I do feel good, some form of flour is always being eaten here at home as a meal or with a meal.

I thought that the transition would be harder, but honestly, it hasn’t been!!  I feel better, have more energy (I’m not ready to run a marathon yet…) and am not craving the bread like I thought I would. Yay!

Sooo…as I embark on this journey I will create new recipes, I will try new recipes and let you know how they turn out!

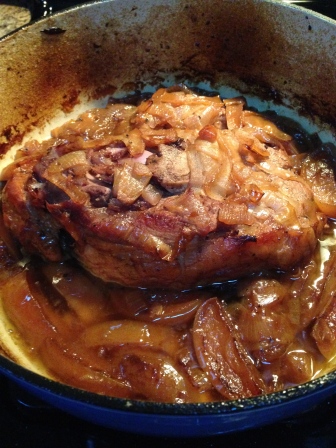
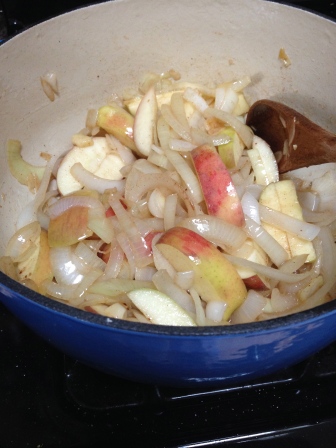
My first official GF recipe is a Roasted Apple and Onion Pork Shoulder.  You could easily use a pork roast or tenderloin too!

IMG_5017 IMG_5020 IMG_5021 IMG_5025 IMG_5022 IMG_5026

Ingredients:

4-6 lb Pork Shoulder (Pasture or organically raised if possible)

Bacon Fat saved from breakfast (you can use olive oil and butter or coconut oil)

5 Cloves of sliced Organic garlic

2-3 Medium Organic Onions, sliced

2-3  Organic Apples, sliced (skin on)

16 oz (or so) of organic chicken stock (homemade would be best)

1.5 Tbl Organic Balsamic Vinegar

3 Tbl Organic Maple Syrup

3 Tsp Organic Cinnamon

Salt and Pepper

Preheat oven to 325 degrees.

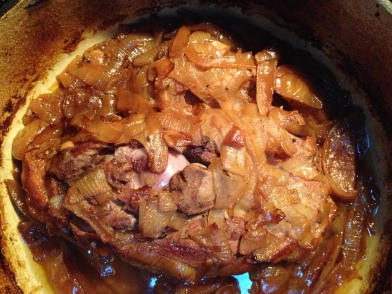
Put about a TBL of bacon fat into the Dutch oven on the stove on a med-high heat and sauté the onions  and garlic.  Once they are beginning to brown, add the apples, cinnamon and the balsamic vinegar.  Cook for a few more minutes then  remove from the pan.  Add about a TBL of bacon fat to the pan.  Generously salt and pepper all sides of the pork shoulder.  Sear all sides of the pork to create a beautiful brown crust.  Once all sides are browned, add the chicken stock (should come  about 1/2 way up the pork) and scrape the sides of the pan with a wooden spoon to get all of the yummy splatters into the sauce.  Add the onions, garlic, apples and maple syrup to the pot.   Cover and place in the oven for 2.5- 3 hours or until the roast is easily pulled apart with a fork.

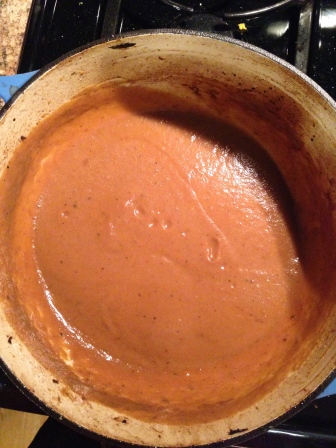
Remove the roast (or roast pieces as it will probably fall apart) from the pan and set aside.  With an immersion blender directly in the pot, buzz the juices, apples and onions together to create an amazing gravy.  I may have splashed a bit of maple syrup into the gravy before buzzing… 😉

Crock pot Option:  I would assume that you could throw all of this into a crock pot, put it on low, go to work and return to an amazing dinner too!!

Although I did not get any pictures of it, I served this with organic carrot sticks roasted in olive oil, salt and pepper and with roasted organic acorn squash.

Roasted Acorn Squash:

Halve the squash carefully as they have a tough skin

Scoop out the seeds

Add a small pat of butter to each half of the squash

I added a teaspoon of brown sugar, salt and pepper to the squash

Roast for at least an hour at 350 degrees or until very tender.  Spoon the juices from the middle of the squash over the squash and scoop out onto the plates.

The kids LOVED this entire meal…I thought the Hubs was going to dive into the pan, he was nuts over it.  I’m glad that I wrote it down!

A litte bit of Mexico…

IMG_2885

Perhaps the hubs was longing for our honeymoon to Mexico…Perhaps he looked around and saw nothing in the house to eat??

Anyway…

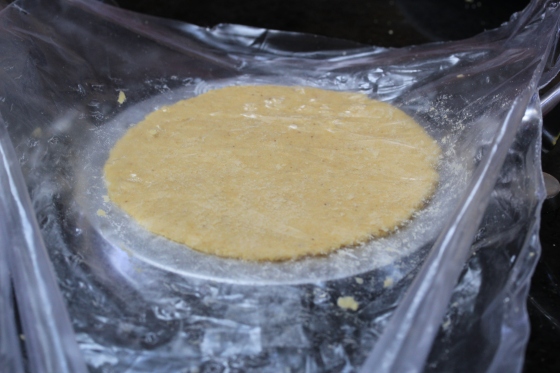
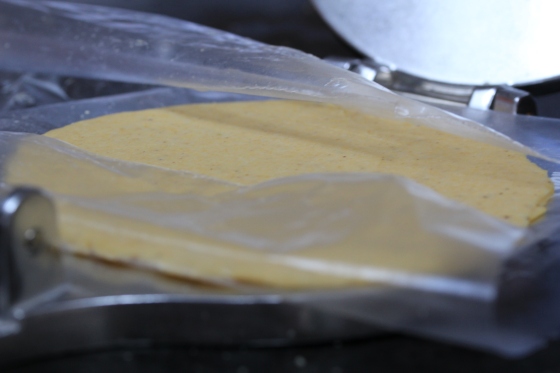
When the man is home on a weekend that we aren’t running around…then he is cooking Which is fine by me!!.   Enter the homemade corn tortillas.

IMG_2887

As I finished my own work, he was busy mixing and resting dough.  He had his Sous Chefs by his side and together they were rolling while the littlest Sous was pressing.  My little guy was so incredibly proud of himself that he showed me each and every tortilla before they were cooked.  Which left me getting very little work done, but hey…them be some yummy tortillas made by a super kid!  I am very lucky. 🙂

IMG_2888

While Mj pressed, Mark cooked.

IMG_2891

This went on for a good while until we had a giant stack of warm, salty, corny (he, he) tortillas.

IMG_2894

IMG_2899


We ended up with tostada like yumminess topped with grass-fed beef, our own canned beans, organic corn, organic salsa and the BEST sour cream out there…Wallaby!

 Seriously, this stuff is almost drinkable!

Anywho…Here is the link to the recipe that was used.  We were able to find organic masa harina too!  NO GMO corn here…ever! 😉

Give it a try…It is super fun for the kids too!

Beans, Beans the Magical Fruit…..

Beans!  Beans! Beans!

IMG_2364

From blazing saddles to kids songs, if you are a man or under the age of 14, beans usually bring one thing to mind..

The Fluffies!

That is what we call a gaseous emission around here, well mostly.  My son is 6 so anything related to the bum is hilarious AND the talk of it is never-ending. 😉

Now, if you are an old mom like myself, you think of the nutrition a value of  beans.  Cooked, dry beans are low in fat, high in fiber and packed with protein. Dry beans provide a rich source of vitamins and minerals as well as plant phytochemicals.

So, take that Fluffies!

The other good thing is that my kids love them and I love serving the babes beans, that is until all of the BPA in metal can linings appeared.  When I found out about BPA, I went out and bought a ton of dried beans knowing that I could get around it all this way.  Except that you need to soak dried beans overnight if you want to eat them without breaking your teeth and who has time for that!?!  I am usually the one pulling frozen beef out of the freezer 30 minutes before dinner.  Organized for meal times, I am not!

So, since I am still afraid of the pressure canner that we bought and I had a closet full of dried beans and a husband that is willing to try anything, we set off to can some beans.

I had read how to do it and even asked a very helpful Facebook friend but was still leery about how they would turn out.  There were opinions about soaking first, not soaking, partial soaking, blah, blah, blah.  We were feeling lazy and impatient so we just put the dried beans in the jars.

IMG_2363

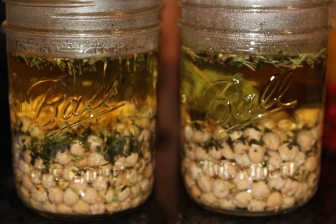
We canned black, kidney and garbanzo beans

IMG_2365

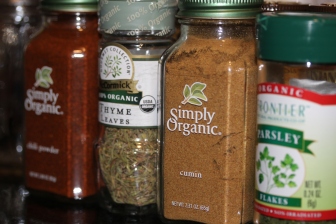
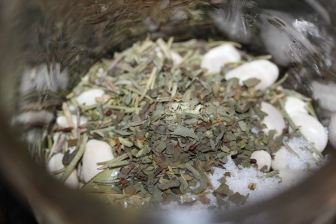
Black bean were treated to Mexican inspired spices, Kidney beans were left plain for soups and garbanzo got an assortment of herbs.

IMG_2375

IMG_2371

IMG_2368

IMG_2379

IMG_2382

We topped some with stock and some with water.  Some with herbs and some with spices.  Capped them all and into the pressure cooker they went.  After about 1 hour, we began to smell the spices and I was convinced that one had busted inside that was going to set off a chain reaction of events that would send the pressure canner careening into the air taking off like an inflated balloon that you’ve mistakenly let go of while blowing it up, zipping around the ceiling until it crash landed in the middle of the kitchen.

 Well, thankfully that did not happen. 🙂 Phew!

All of the jars were sealed, none broken and we had lots of fast and convenient organic beans to grab for any meal.  The best part, they are less than half the price of the already canned beans at the store and it took us less than 15 minutes to prep and a little over an hour to process, set it and forget it style (unless you are like me, cowering in a corner waiting for the explosion).

IMG_2389

IMG_2392

 Pardon the goo on the jars, they were the bottom row in the water…

Now we have a closet full of beans, ready to eat!  I feel like I go to them more as an option for dinners because they are ready to go, easy and done.  I’ve even popped open a jar of chick peas to munch on… They are soooo good!

This is how we did it.

In each of the 12 oz jars we put 1/2 cup of beans, 1/2 teaspoon of salt and whatever herbs or spices that you want in them and filled the rest of the way (leaving 1 inch at the top for expansion) and give a quick stir. Cap those babies and set them in the pressure canner.  Follow the directions on the canner for water levels.  Start ‘er up and let ‘er rip for about 70 minutes. Then let your canner de-pressurize naturally.

Pull those bad boys out (with canning tongs of course) set them on a clean dry towel to rest over night.  In the morning put them away.  Simple as that!

We’ve flown right through the jars that we made, so it’s time to do it again!

** I found that in the 12 oz jars, I would put a little less beans, the really sucked up the liquid.  I might also try a really quick par boil before too…I bet that would help in pre-sucking up the liquid. 😉

I’ll keep ya posted…

IMG_2454

Wheat pizza with salsa, cheese and a can of our beans with frozen corn added to it.

Quick and yummy Mexican pizza!!

The Perfect Sprouted Wheat Pancakes…

I am not afraid to admit when I can’t do something.

I CAN’T make pancakes!

Even after working in restaurants for all of my working years, 4 years of culinary school and owning 2 food service businesses and I still can’t make pancakes.  Normally they turn out too runny, flat, undercooked or just plain burnt.  Whether a mix or not, the only way the I ever got pretty griddle brown pancakes was opening a box of pre-made, pre-beautifully browned pancakes.   If you know me at all, you’d know that I am very anti-processed and pre-made foods, so doing this to satisfy my kids want for pancakes really hurt my heart.

That is until now!

This is the recipe that saved my kids from years of therapy that would eventually stem from my pancake incompetence.

IMG_3413

Wahoo!!  Fluffy AND hard to burn…for whatever reason.

Bonus is that they contain sprouted wheat!

A bit about sprouted grains…

Sprouting grains changes the composition of starch molecules, converting them into vegetable sugars, so the body recognizes and digests sprouted grains as a vegetable

In sprouted grains enzymes are created that aid digestion, complex sugars are broken down which can eliminate painful gas, and vitamin and mineral levels increase.

Sprouting neutralizes potent carcinogens and enzyme inhibitors, as well as an acid that inhibits absorption of calcium, magnesium, iron, copper and zinc.

You can grab sprouted wheat flour

31CZnwlr3fL

at just about any grocery store, check out the natural and organic sections or here on Amazon !

Health Benefits abound and the kids were none the wiser !

Without further adieu..

Sprouted Wheat Pancakes

INGREDIENTS:

1 Cup Organic Whole Wheat Flour

1.5 Cups Organic Sprouted Wheat Flour

4 Teaspoons Baking Powder

2 Farm Fresh Eggs

2 (+) Cups Organic Whole Milk

1 Teaspoon Salt

1/4 cup (more or less to taste) Local Honey

Apples, Blueberries, Bananas, Coconut…any thing that you’d like to add

1. Mix together flours and baking powder

2. In separate bowl beat together egg, milk, salt and honey .

3. Stir in flour until just mixed.  Add fruits or nuts

4. Pre-heat griddle or pan over medium heat.  Melt a small amount of butter or coconut oil pan.

5. Ladle small amount of batter, cook until bubbly.  Flip and repeat with the rest of the batter unit you have a stack of golden brown pancakes.

Freeze what isn’t eaten and voila! fast breakfast on a busy morning.

Balance…

Balance… The dictionary defines it as “a state of equilibrium”

As one can plainly see, I have not quite struck the nail on the head with this balance thing for the past few months.  This blog is very important to me as it is a written history of our journey, a journey that we begun just about the time that I started this blog.  This blog is for me, it is for my family, it is our past, present and future.  It’s purpose is to be our story.  If along the way we help others along their journey with a quick tip, recipe or nudge to do something that they thought was impossible, or even a laugh…that’s great! Yay!

So…Back here I am.  I seldom get quiet time with all of the happenings around here, but when I am blogging, people seem to leave me alone.

I’ll take it! 🙂

My friends…this has been our busiest season yet for our businesses and being so, I got pulled away from much that I do.  There was less time for homemade items and new recipes.  Our Christmas was a little lighter on the homemade gifts this year, but fun none the less.  My dreams of sitting near the fire reading (with all of the down time that winter should bring) hasn’t happened yet….but it is good to have a busy business!  With the business, balance is harder to come by though…balance with the kids homeschooling, balance with our farm (thankfully only 15 chickens are hanging out with us this winter), balance in our family life and marriage, balance with the household, balance in general.  I am beginning to find balance again…through routine and schedules.  I am NOT a routine person…let me say that again.  I am NOT a routine person.  I much prefer to just do what comes, however with all that is coming at me lately, I’ve decided to try the routine route and see what come of it.  Sticking to it will be the hard part…but I believe that it will make my life easier…at least I hope it will.

9668_4349526049158_1830925928_n

All said and done…we had a wonderful Holiday albeit busy.   Hope yours was wonderful too<3